Deck · by ProxyFriendly · Combo
Broodlord Turbo
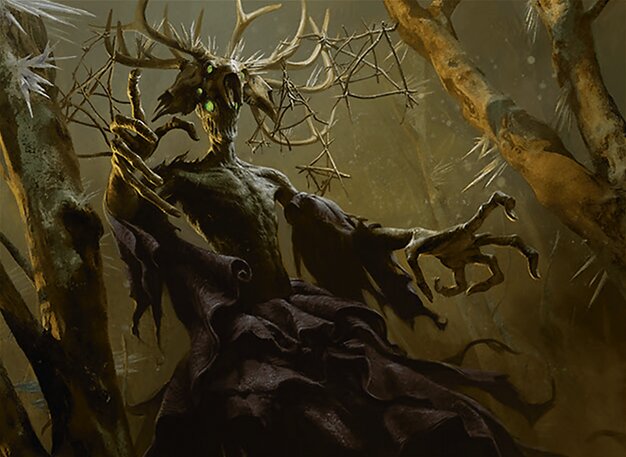
Old Stickfingers
Deck list
Cards
View
Commander
Creatures
- CCU $4.92
Instants
- CCU $2.45
- CCU $11.90
- CCU $1.00
- CCU $0.69
- CCU $0.33
- CCU —
- CCU —
- CCU $3.35
- CCU $6.98
- CCU $5.73
- CCU $26.07
- CCU $4.88
- CCU $17.80
- CCU $8.21
- CCU $6.88
- CCU $1.10
- CCU $6.94
- CCU $8.20
- CCU —
- CCU $5.83
- CCU $108.39
- CCU $1.16
- CCU $55.11
- CCU $4.37
Sorceries
- CCU $18.65
- CCU $5.87
- CCU $3.25
- CCU $64.74
- CCU $15.92
- CCU $0.10
- CCU $5.04
- CCU $0.16
- CCU $0.29
- CCU $24.97
- CCU $162.66
- CCU $0.60
- CCU $0.36
- CCU $0.43
- CCU $1.25
- CCU $8.93
- CCU —
- CCU —
- CCU $9.14
- CCU $4.28
- CCU $2.70
- CCU $20.29
- CCU —
Artifacts
- CCU $21.80
- CCU $164.83
- CCU $6.73
- CCU $42.40
- CCU —
- CCU $41.66
- CCU $118.26
- CCU $2.47
- CCU $81.05
- CCU —
- CCU $2.34
- CCU $1.59
- CCU $111.29
- CCU $1.99
- CCU $1.68
Enchantments
- CCU $6.88
- CCU $5.70
- CCU —
- CCU $19.70
- CCU $89.45
- CCU $25.86
- CCU $2.07
- CCU $0.57
Lands
- CCU $134.58
- CCU —
- CCU $17.96
- CCU $2.34
- CCU $49.73
- CCU $50.05
- CCU $12.44
- CCU —
- CCU $0.28
- CCU $8.68
- CCU —
- CCU $57.70
- CCU $13.23
- CCU $32.67
- CCU $30.79
- CCU $38.07
- CCU —
- CCU $27.09
- CCU $19.41
- CCU $10.42
- CCU —
- CCU $38.13
- CCU $61.40
- CCU $40.25
- CCU $28.24
- CCU $12.29
- CCU $17.05
- CCU $15.98
Deck primer
# OLD STICKFINGERS
Cali Commander — Beginner's Deck Primer
Strategy: Golgari Turbo Reanimator / Broodlord Combo / Storm
Main goal: Put Hoarding Broodlord into our graveyard, reanimate it quickly, and use its powerful search abilities to assemble a winning combination.
1. How Does This Deck Work?
Old Stickfingers costs {X}{B}{G}.
When we cast it, we reveal cards from our library until we've revealed X creature cards. Those creatures go into our graveyard.
Here's the secret:
Hoarding Broodlord is the only creature in our entire 99-card deck!
Casting Stickfingers with X=1 guarantees that we'll put Broodlord into our graveyard, as long as it's still in our library.
Our main strategies are:
- Stickfingers: Reliably put Broodlord in our graveyard.
- Reanimator: Bring Broodlord back for very little mana.
- Saw in Half: Make additional Broodlords to search for cards.
- Graveyard Recursion: Reuse spells with Yawgmoth's Will or Gaea's Will.
- Storm: Finish with Tendrils of Agony or Aetherflux Reservoir.
Important Words
Tutor: Search our library for a card.
Reanimate: Return a creature from our graveyard to the battlefield.
Convoke: Tap creatures to help pay for a spell.
Storm: Copies a spell based on how many spells were cast earlier that turn.
Bargain: Sacrifice an artifact, enchantment, or token as an additional casting cost.
Sacrifice Outlet: A card that lets us sacrifice our own permanents.
2. How to Start the Game
Our opening hand should have mana, a way to find Broodlord, and reanimation.
Our best starting cards
Fast mana: Mana Crypt, Sol Ring, Mana Vault, Dark Ritual, Lotus Petal, Chrome Mox, or Mox Diamond.
Graveyard setup: Old Stickfingers, Entomb, or Unmarked Grave.
Reanimation: Reanimate, Animate Dead, Dance of the Dead, Necromancy, Persist, or Exhume.
Protection: Defense Grid, Veil of Summer, Autumn's Veil, or Thoughtseize.
Consider a mulligan if we cannot produce black and green mana or lack a realistic way to begin our combo.
What if Broodlord is in our opening hand?
Stickfingers can't find Broodlord if it's already in our hand.
We can sometimes discard Broodlord with Bitter Triumph, or by targeting ourselves with Cabal Therapy or Unmask.
Bitter Triumph needs a legal target to cast it.
Otherwise, a mulligan may be better.
Beginner tip: We don't need lots of different creatures. We need the mana and spells to bring our one important creature into play.
3. Understanding Old Stickfingers
Our commander is mainly a guaranteed graveyard tutor.
The X=1 combination
- Cast Stickfingers for
{1}{B}{G}. - Its cast ability triggers.
- Reveal cards until we find Hoarding Broodlord.
- Put Broodlord into our graveyard.
- Put the other revealed cards on the bottom of our library in a random order.
Now Broodlord is ready to reanimate!
What if Stickfingers gets countered?
Its ability triggers when we cast it.
Even if the opponent counters Stickfingers, its ability can still resolve and put Broodlord into our graveyard.
What if Broodlord isn't in the library?
Stickfingers cannot find a creature that's already in our hand, graveyard, or exile.
Casting Stickfingers with X=1 might reveal our entire library without finding anything.
The noncreature cards don't go into our graveyard.
Is Stickfingers a good attacker?
Its power and toughness equal the number of creature cards in our graveyard.
Usually, that means Stickfingers is only a 1/1 after finding Broodlord.
We're not trying to win with Stickfingers' combat damage. We're using it to find Broodlord!
4. Reanimating Hoarding Broodlord
Broodlord normally costs eight mana.
We want to put it onto the battlefield for much less.
Our main reanimation spells
Reanimate: Costs one black mana and eight life.
Animate Dead and Dance of the Dead: Two-mana enchantments that bring Broodlord back.
Necromancy: Can also be cast at instant speed.
Persist: Returns Broodlord with a -1/-1 counter.
Exhume: Returns a creature for each player, so the opponent also benefits.
Death (from Life // Death): Reanimates Broodlord for two mana and eight life.
Soul Exchange: Exile a creature we control as an additional cost, then reanimate Broodlord.
Shallow Grave: Returns the top creature card in our graveyard with haste until the end step.
Corpse Dance: Returns the top creature card with haste and can return to our hand using buyback.
Turn Stickfingers into mana
Culling the Weak: Sacrifice Stickfingers for four black mana.
Phyrexian Tower: Sacrifice Stickfingers for two black mana.
Diabolic Intent: Sacrifice Stickfingers to tutor for our missing reanimation spell.
Soul Exchange: Exile Stickfingers as the additional cost to reanimate Broodlord.
Important graveyard rule
Shallow Grave and Corpse Dance return the top creature card in our graveyard.
If Stickfingers dies and stays above Broodlord, they might return Stickfingers instead.
Whenever possible, move Stickfingers to the command zone when it dies.
Beginner tip: First put Broodlord into our graveyard. Then use the cheapest available reanimation spell to begin winning.
5. Broodlord + Saw in Half
This is our main combo engine.
When Broodlord enters, we search for any card, exile it face down, and may play it from exile.
Broodlord also gives spells cast from exile convoke.
Step 1: Find Saw in Half
Reanimate Broodlord.
Its ability searches for Saw in Half.
Cast Saw in Half from exile, targeting Broodlord.
We must still pay its casting cost, but Broodlord's convoke ability can help.
Step 2: Create two Broodlords
Saw in Half destroys our original Broodlord and creates two smaller token copies.
Both tokens trigger when they enter!
We now search for two cards.
Find:
- Sacrifice
- Yawgmoth's Will
Step 3: Make eight black mana
Cast Sacrifice, sacrificing one Broodlord token as its additional cost.
Sacrifice produces black mana equal to that creature's mana value.
Even though the Broodlord tokens are smaller, they still have mana value eight!
That means Sacrifice produces eight black mana.
Step 4: Reuse Saw in Half
Cast Yawgmoth's Will.
Now we can cast spells from our graveyard during this turn.
Cast Saw in Half again from the graveyard, targeting our remaining Broodlord token.
Saw destroys that token and creates two more Broodlord tokens.
We get two more searches!
Step 5: Find our winning cards
The new Broodlord triggers can find:
- Tendrils of Agony
- Aetherflux Reservoir
- Dark Ritual or Cabal Ritual
- Beseech the Mirror
- Another tutor or mana source
We use our available mana and graveyard spells to build a winning turn.
Important: Yawgmoth's Will doesn't allow unlimited use of the same card. Spells that would go to our graveyard afterward are exiled instead.
This is a powerful engine, but we still need enough mana and spells to finish.
Beginner tip: Memorize: Broodlord → Saw in Half → Sacrifice for eight mana → Yawgmoth's Will → Saw in Half again.
6. Winning With Tendrils of Agony
Tendrils of Agony is our main storm finisher.
It makes the opponent lose two life while we gain two.
Its storm ability copies it for every spell cast earlier that turn.
How much storm do we need?
In Cali Commander, the opponent normally starts at 30 life.
Each Tendrils resolution drains two life.
We need 15 total Tendrils resolutions to drain 30 life.
That means casting 14 spells before Tendrils, then casting Tendrils itself.
How do we increase storm?
We can cast:
- Fast mana artifacts.
- Dark Ritual and Cabal Ritual.
- Tutors.
- Saw in Half.
- Reanimation spells.
- Other spells reused through Yawgmoth's Will or Gaea's Will.
Remember that storm counts spells cast, not activated abilities.
Beginner tip: Keep track of how many spells we've cast as we play them. Don't try to remember our storm count afterward!
7. Winning With Aetherflux Reservoir
Aetherflux Reservoir provides another way to finish.
Whenever we cast a spell while Reservoir is on the battlefield, we gain life equal to the number of spells we've cast that turn.
For example:
Spell #5: Gain five life.
Spell #6: Gain six life.
Spell #7: Gain seven life.
Reservoir counts spells cast earlier that turn, even before Reservoir entered.
How do we win?
Once we have at least 50 life, we can pay 50 life to deal 50 damage to the opponent.
That's enough to win from their normal starting life total.
Why is Broodlord powerful here?
Broodlord can find Reservoir and the spells needed to keep going.
Yawgmoth's Will or Gaea's Will can provide additional spells from our graveyard.
As we continue casting, Reservoir gains more and more life!
Beginner tip: If we can't build enough storm for Tendrils, check whether Reservoir can finish instead.
8. Beseech the Mirror + Gaea's Will
This is another powerful way to reuse our graveyard.
Beseech the Mirror searches for any card.
If we bargain it by sacrificing an artifact, enchantment, or token, we may immediately cast the card we find if its mana value is four or less.
The special Gaea's Will trick
Gaea's Will has no normal mana cost.
We cannot simply cast it from our hand.
But Beseech can cast it without paying its mana cost!
- Have an artifact, enchantment, or token available to sacrifice.
- Cast Beseech the Mirror and bargain it.
- Search for Gaea's Will.
- Cast Gaea's Will for free.
- We can now play lands and cast spells from our graveyard for the rest of the turn.
This can reuse rituals, mana rocks, and tutors to help us finish.
Yawgmoth's Will versus Gaea's Will
Yawgmoth's Will: We can cast it normally for three mana.
Gaea's Will: Usually needs Beseech or another way to cast it without paying its mana cost.
Both let us replay graveyard cards, but cards going to our graveyard afterward get exiled instead.
Watch out for Vexing Bauble!
Vexing Bauble counters spells cast without spending mana.
If we cast Gaea's Will for free using Beseech, our own Bauble can counter it!
Sacrifice Bauble to draw a card before attempting this combination.
Beginner tip: These spells are strongest after we've already used several mana sources and tutors.
9. Our Fastest Mana Sources
This deck tries to generate enough mana to win before the opponent can establish control.
Our best acceleration
Mana Crypt: Zero mana to cast, produces two colorless mana.
Sol Ring: One mana to cast, produces two colorless mana.
Mana Vault: One mana to cast, produces three colorless mana.
Dark Ritual: One black mana becomes three.
Cabal Ritual: Produces more mana with threshold.
Culling the Weak: Sacrifice a creature for four black mana.
Lotus Petal: Produces one mana of any color.
Chrome Mox and Mox Diamond: Provide early colored mana.
Jeweled Lotus: Helps cast Stickfingers from the command zone.
Mox Amber: Can produce black or green mana while Stickfingers is on the battlefield.
Sacrifice — Our biggest burst
Sacrifice produces black mana equal to a sacrificed creature's mana value.
A Broodlord or Broodlord token produces eight mana.
Stickfingers normally has mana value two on the battlefield, even when we cast it with X=1.
So sacrificing Stickfingers to Sacrifice only produces two mana.
Our important lands
Ancient Tomb and City of Traitors: Each produces two colorless mana.
Crystal Vein: Can be sacrificed for two colorless mana.
Phyrexian Tower: Turns Stickfingers into two black mana.
Squandered Resources and Rain of Filth
Both let us sacrifice lands for additional mana.
We can tap lands first, then sacrifice them to produce more.
This can provide a large burst of mana, but leaves us with fewer lands if we fail to win.
Beginner tip: Count black mana carefully. Many of our most important spells need black rather than colorless mana.
10. Finding More Cards
Our deck has many tutors because we need to assemble specific combinations quickly.
Important tutors
Demonic Tutor: Finds any card.
Vampiric Tutor: Puts any card on top of our library at instant speed.
Imperial Seal: Similar, but sorcery speed.
Grim Tutor: Finds any card and costs three life.
Dark Petition: Finds any card and may provide three black mana with spell mastery.
Beseech the Mirror: Searches for a card or casts one for free when bargained.
Wishclaw Talisman: Finds any card but gives the opponent access to Talisman afterward.
Entomb: Puts any card directly into our graveyard.
Unmarked Grave: Finds a nonlegendary card, including Broodlord, and puts it into our graveyard.
Shred Memory
Shred Memory can exile cards from graveyards.
Its transmute ability also lets us search for a card with mana value two.
That includes Animate Dead, Dance of the Dead, Exhume, Persist, and Wishclaw Talisman.
Ad Nauseam
Ad Nauseam can draw many cards at the cost of life.
Our deck has plenty of inexpensive cards, making it powerful.
However, Broodlord has mana value eight.
Revealing it costs eight life!
Always check our life total before continuing to reveal cards.
The One Ring and Sylvan Library
The One Ring: Protects us when cast and can draw cards over several turns.
Sylvan Library: Improves our draws and allows us to pay life for additional cards.
Both help recover if our first attempt fails.
11. How to Protect Our Combo
Our opponent will often try to counter our spells or remove Broodlord.
Defense Grid
Makes spells cast outside their controller's turn cost three additional mana.
During our turn, opposing counterspells and removal become much more expensive.
Veil of Summer and Autumn's Veil
Protect our spells against blue and black interaction.
Veil of Summer can also draw us a card.
Hand disruption
Thoughtseize, Duress, and Inquisition of Kozilek remove dangerous cards from the opponent's hand.
Unmask can be cast for free by exiling another black card from our hand.
Useful removal
Abrupt Decay: Removes inexpensive nonland permanents and can't be countered.
Assassin's Trophy: Destroys an opposing permanent.
Nature's Claim and Force of Vigor: Remove artifacts and enchantments.
Deadly Rollick: Can be free while Stickfingers is on the battlefield.
Toxic Deluge: Clears opposing creatures.
Imp's Mischief: Changes the target of certain dangerous spells.
Vexing Bauble
Vexing Bauble can stop free opposing spells.
However, it also counters our own spells cast without spending mana.
Remember this before trying the Gaea's Will combination!
Beginner tip: Try to remove the opponent's interaction before committing all our resources to Broodlord.
12. Other Powerful Tricks
Urza's Saga
Urza's Saga can find useful zero- or one-mana artifacts, including:
- Mana Crypt
- Sol Ring
- Lotus Petal
- Mishra's Bauble
- Nihil Spellbomb
- Vexing Bauble
It can also create Construct tokens.
Life // Death
Death reanimates Broodlord for two mana and eight life.
Life turns our lands into creatures for the turn.
The Life half can make a land available to sacrifice to Culling the Weak or Diabolic Intent.
Noxious Revival
Puts a card from a graveyard on top of a library.
We can use it to recover a missing combo piece.
Malakir Rebirth
Can bring Broodlord back after it dies, triggering its search ability again.
It can also be played as a land.
Malevolent Rumble
Looks at the top four cards and can find a creature or land.
Other revealed cards go into our graveyard.
It also creates an Eldrazi Spawn token that can be sacrificed for mana or used to bargain Beseech the Mirror.
Phyrexian Tower and Crop Rotation
Phyrexian Tower sacrifices creatures for mana.
Crop Rotation can search for Tower, Urza's Saga, Boseiju, or another useful land.
Yavimaya and Urborg
Yavimaya makes lands Forests.
Urborg, Tomb of Yawgmoth makes lands Swamps.
Both improve our mana options.
13. Common Mistakes to Avoid
Broodlord in hand: Stickfingers can't find Broodlord when it's no longer in our library.
Thinking Stickfingers mills everything: Only the revealed creatures enter our graveyard. Other revealed cards go to the bottom of our library.
Misusing Shallow Grave: It returns the top creature card, not any creature we choose.
Forgetting Broodlord's mana value: Saw in Half tokens still have mana value eight.
Assuming unlimited recursion: Yawgmoth's Will and Gaea's Will exile cards that would return to our graveyard.
Casting Gaea's Will normally: It has no regular mana cost.
Forgetting Vexing Bauble: It can counter our own free spells.
Overusing Ad Nauseam: Losing too much life can prevent us from completing our combo.
Casting Tendrils too early: Count our storm before casting it.
Activating Reservoir without enough life: Paying 50 life requires having at least 50 life available.
14. Ten Tips to Become a Better Stickfingers Player
- Keep hands with mana and reanimation. These are our most important resources.
- Remember X=1. Stickfingers reliably finds Broodlord while it's in the library.
- Learn Broodlord's main combo. Saw in Half → Sacrifice → Yawgmoth's Will.
- Count our mana carefully. Most important spells require black mana.
- Know our reanimation choices. Different spells have different costs and restrictions.
- Protect our winning turn. Defense Grid and hand disruption can make the difference.
- Use Beseech intelligently. Bargaining it can immediately cast Gaea's Will.
- Keep track of storm. Count spells as we cast them.
- Remember Reservoir. Sometimes it's easier to gain enough life than build lethal Tendrils.
- Don't give up if Broodlord is removed. We have several ways to reanimate it again.
Final Advice
The most important lesson about Old Stickfingers is simple:
We built our entire creature package around finding exactly one creature, every time!
Sometimes Stickfingers puts Broodlord into our graveyard.
Sometimes Entomb or Unmarked Grave does it faster.
Sometimes Saw in Half turns one Broodlord into several tutors.
Sometimes Sacrifice produces eight black mana.
Sometimes Yawgmoth's Will or Gaea's Will lets us replay powerful spells.
And sometimes Tendrils of Agony or Aetherflux Reservoir ends the game immediately.
Start by practicing Stickfingers with X=1, then learn the Broodlord → Saw in Half → Sacrifice combination. Finally, practice assembling our different storm finishes.
The goal is to play quickly, find Broodlord reliably, protect our winning turn, and turn one powerful creature into an explosive victory!
Deck stats
Statistics
Cost
Production
0 pips - 0 cards
15 mana - 15 cards
0 pips - 0 cards
15 mana - 15 cards
57 pips - 47 cards
28 mana - 28 cards
0 pips - 0 cards
15 mana - 15 cards
17 pips - 16 cards
22 mana - 22 cards
0 pips - 0 cards
13 mana - 13 cards
Avg Mana Value: 1.92
Median: 2.00
Incl. lands: 1.39
Total Mana Value: 139.00
Lands: 28
Enter untapped: 24
Conditional: 3
Always tapped: 1
Mana curve
Mana curve by Color
White Spells
Blue Spells
Black Spells
Red Spells
Green Spells
Colorless Spells
Opening hand
Lands in a 7-card hand from your 28-land, 99-card mainboard. Exact odds, not a sample.
Avg lands: 1.98
2–5 lands: 64%
| Lands | Chance | % |
|---|---|---|
| 0 | 9% | |
| 1 | 27% | |
| 2 | 33% | |
| 3 | 21% | |
| 4 | 8% | |
| 5 | 2% | |
| 6 | <1% | |
| 7 | <1% |
Probability of drawing at leastcard(s) by Categories, having drawncard(s)
| Categories | Qty | Odds |
|---|---|---|
| Creatures | 1 | 7% |
| Instants | 24 | 87% |
| Sorceries | 23 | 85% |
| Artifacts | 15 | 70% |
| Enchantments | 8 | 46% |
| Lands | 28 | 91% |
Quantity of Categories
Price
Total: $2,109.33
14 cards with no price
Where it goes
| Lands | 28 | $718.78 | 34% |
| Artifacts | 15 | $598.09 | 28% |
| Sorceries | 23 | $349.63 | 17% |
| Instants | 24 | $287.37 | 14% |
| Enchantments | 8 | $150.23 | 7% |
| Creatures | 1 | $4.92 | 0% |
| Commander | 1 | $0.31 | 0% |
How it spreads
| < $1 | 11 | $4.12 | |
| $1–5 | 19 | $49.19 | |
| $5–20 | 28 | $308.49 | |
| $20–50 | 15 | $488.02 | |
| $50+ | 13 | $1,259.51 |
Comments (0)
Sign in to join the conversation.
No comments yet.